
first aid cpr aed participant’s manual pdf
First Aid, CPR, and AED: A Participant Manual Overview
This manual details crucial emergency response skills, covering adult, infant, and child CPR/AED techniques, alongside essential first aid procedures for various scenarios․
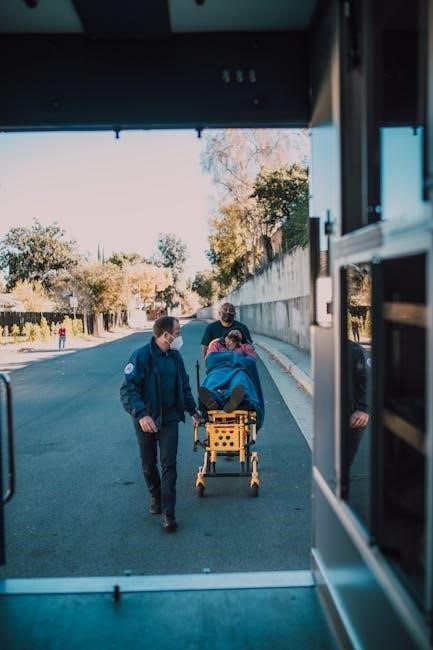
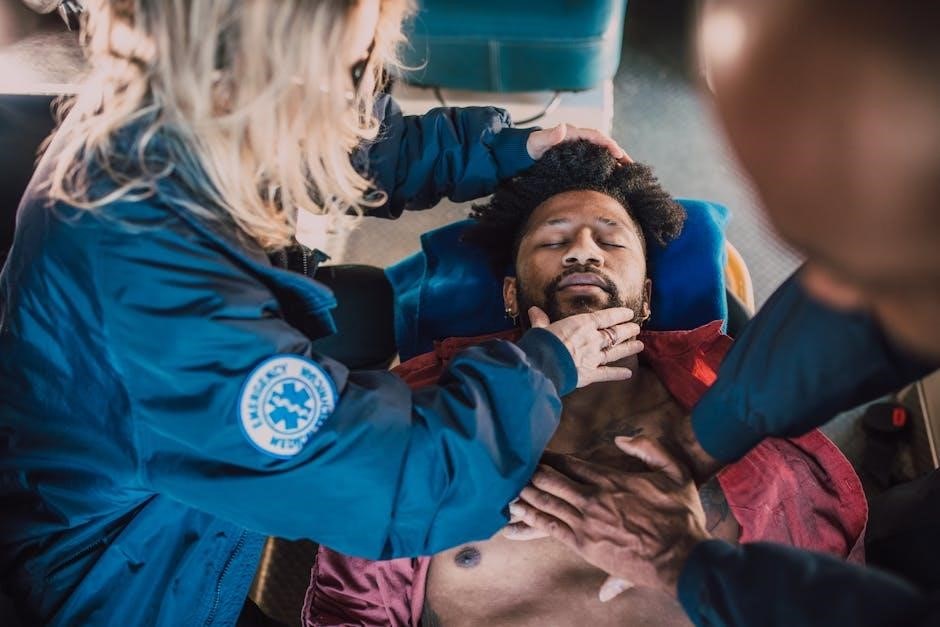
Effective emergency response begins with preparedness and a clear understanding of your role․ This section introduces the fundamental principles of providing immediate assistance to individuals experiencing sudden illness or injury․ Recognizing emergencies, ensuring scene safety, and activating the emergency medical services (EMS) system are paramount first steps․
Participants will learn how to assess a situation quickly and accurately, prioritizing life-threatening conditions․ We will cover the importance of universal precautions to protect both the rescuer and the victim․ This module emphasizes the critical link between early intervention – including CPR, AED usage, and basic first aid – and improved patient outcomes․
Understanding Good Samaritan laws and the legal aspects of providing aid is also crucial․ This introduction sets the foundation for the practical skills developed throughout this manual, empowering you to confidently respond in a crisis and potentially save a life․ Remember, every second counts!

Understanding CPR Fundamentals
Cardiopulmonary resuscitation (CPR) is a vital skill, maintaining blood and oxygen flow when the heart and breathing stop, crucial for survival․
Adult CPR Techniques
Initiating adult CPR requires a systematic approach․ First, ensure scene safety and check for responsiveness; gently shake and shout․ If no response, immediately call emergency services or delegate someone to do so․ Begin chest compressions – place the heel of one hand in the center of the chest, with the other hand on top, interlacing fingers․
Compress the chest at least 2 inches deep and at a rate of 100-120 compressions per minute․ Allow for full chest recoil after each compression․ After 30 compressions, deliver two rescue breaths, ensuring the chest rises visibly․ Continue cycles of 30 compressions and 2 breaths until professional help arrives, an AED is ready, or the person shows signs of life․ Proper hand placement and consistent depth are paramount for effective CPR․
Child CPR Techniques
Child CPR differs slightly from adult techniques․ After confirming unresponsiveness and activating emergency services, assess for breathing․ If absent or only gasping, begin chest compressions․ Use one or two hands, depending on the child’s size, to compress the chest approximately 2 inches deep, maintaining a rate of 100-120 compressions per minute․
Deliver two rescue breaths after every 30 compressions, ensuring visible chest rise․ If a single rescuer is present, continue cycles of 30 compressions and 2 breaths․ For infants and small children, consider using a barrier device for rescue breaths․ Continue CPR until professional help arrives, an AED is available, or the child shows signs of life․ Adapt compression depth to the child’s size for optimal effectiveness․
Infant CPR Techniques
Infant CPR requires specific modifications due to their smaller size and delicate anatomy․ After ensuring the infant is unresponsive and activating emergency services, check for breathing․ If absent or only gasping, begin chest compressions using two fingers (index and middle) on the center of the infant’s chest, just below the nipple line․
Compress the chest approximately 1․5 inches deep at a rate of 100-120 compressions per minute․ Deliver two gentle rescue breaths after every 30 compressions, ensuring visible chest rise․ Cover the infant’s mouth and nose with your mouth to create a seal․ Continue cycles of 30 compressions and 2 breaths until help arrives or the infant shows signs of life․ Gentle, consistent compressions are crucial․

Automated External Defibrillator (AED) Usage
AEDs analyze heart rhythm and deliver shocks if needed, potentially restoring normal function; proper training and adherence to safety protocols are paramount for effective use․
AED Safety Precautions
Prior to AED use, ensure scene safety: remove any potential hazards and confirm the victim is not in contact with water or wet surfaces․ Thoroughly dry the chest if necessary․ Avoid using an AED on individuals wearing medical patches or implanted devices – if unavoidable, position the pad at least one inch away from the device․
Never touch the patient while the AED is analyzing or delivering a shock․ Verbally announce “Clear!” before pressing the shock button, ensuring no one is touching the victim․ Be mindful of flammable materials like oxygen tanks, keeping them at a safe distance․
Regularly inspect the AED for damage and ensure the battery is adequately charged․ Follow manufacturer’s guidelines for pad expiration dates․ Proper maintenance and adherence to these precautions maximize safety and effectiveness during a cardiac emergency, potentially saving a life․
Step-by-Step AED Operation
Power on the AED and follow the voice prompts․ Expose the victim’s chest and attach the AED pads – one on the upper right chest, below the collarbone, and the other on the lower left side of the chest, below the armpit․ Ensure firm skin contact․
The AED will analyze the heart rhythm․ Do not touch the victim during analysis․ If a shock is advised, the AED will charge․ Verbally announce “Clear!” ensuring no one is touching the victim before pressing the shock button․
After delivering a shock, or if no shock is advised, immediately resume CPR, starting with chest compressions․ Continue following the AED’s prompts, alternating between CPR and AED analysis/shocks until emergency medical services arrive and take over․ Consistent adherence to these steps is vital․
AED Troubleshooting
If the AED fails to power on, check the battery․ Replace if necessary, ensuring correct insertion․ If the pads aren’t adhering, dry the chest and apply new pads․ Ensure proper skin contact – excessive hair may require shaving․
If the AED indicates “No Shock Advised,” continue CPR uninterrupted․ The device determined a shock wasn’t needed at that moment․ If the AED repeatedly states “Analyzing,” ensure no motion or contact with the victim during assessment․
Should the AED display an error message, consult the device’s manual․ Document the error and continue CPR until help arrives․ Remember, AEDs are designed to be user-friendly, but understanding potential issues enhances effective response․ Always prioritize safety and follow prompts․

Essential First Aid Procedures
Mastering techniques for controlling bleeding, treating burns, and responding to choking are vital skills, forming the core of immediate care in emergencies․
Controlling Bleeding
Effective bleeding control is paramount in first aid, as significant blood loss can rapidly become life-threatening․ Begin by ensuring your own safety, utilizing personal protective equipment like gloves if available․ Direct pressure is the primary method; apply firm, consistent pressure directly onto the wound using a clean cloth or dressing․
Elevate the injured limb above the heart whenever possible, as this helps reduce blood flow to the area․ If direct pressure and elevation are insufficient, consider applying a pressure bandage, wrapping it snugly but not so tightly as to cut off circulation․
For severe, life-threatening bleeding, tourniquet application may be necessary, but only if you’ve received proper training․ Continuously monitor the casualty for signs of shock – pale skin, rapid pulse, and altered mental status – and seek immediate medical attention․ Remember to document the time of tourniquet application, if used․
Treating Burns
Burn treatment prioritizes cooling the affected area and minimizing further damage․ Immediately stop the burning process and remove the casualty from the source․ Cool the burn with cool (not cold) running water for at least 10-20 minutes – this is crucial for reducing tissue damage․ Do not use ice, as it can cause further harm․
Cover the burn loosely with a sterile, non-adhesive dressing or clean cloth․ Avoid applying ointments, creams, or butter, as these can trap heat and increase infection risk․ For minor burns, over-the-counter pain relievers can help manage discomfort․
Seek immediate medical attention for large burns, burns involving the face, hands, feet, or genitals, or burns that appear deep or cause significant pain․ Monitor for signs of shock and keep the casualty warm and comfortable until help arrives․
Responding to Choking
Recognizing choking is the first step; look for signs like inability to speak, cough, or breathe․ If someone is choking and can cough forcefully, encourage them to continue coughing․ However, if coughing becomes ineffective, or the person shows signs of distress, intervene immediately․
For a conscious adult or child, perform abdominal thrusts (Heimlich maneuver)․ Stand behind the person, wrap your arms around their waist, make a fist, and place it just above their navel․ Give quick, upward thrusts until the object is dislodged or the person becomes unconscious․
If the person becomes unconscious, carefully lower them to the ground and begin CPR, checking the mouth for the obstructing object before each set of compressions․ Seek immediate medical attention even if the object is successfully removed․

Common Medical Emergencies
This section covers recognizing critical conditions like heart attack, stroke, and allergic reactions, emphasizing prompt assessment and appropriate first aid responses․

Heart Attack Recognition
Recognizing a heart attack is critical for timely intervention․ Common symptoms include chest discomfort – pressure, squeezing, fullness, or pain – that may radiate to the arms, jaw, neck, back, or stomach․ Shortness of breath, cold sweat, nausea, lightheadedness, and unusual fatigue are also frequently experienced․
It’s important to note that symptoms can vary significantly between individuals, particularly between men and women․ Women are more likely to experience atypical symptoms like back or jaw pain, and shortness of breath without chest discomfort․
If you suspect someone is having a heart attack, immediately call emergency services․ Have the person stop all activity and rest comfortably․ If they are conscious and alert, and have been prescribed nitroglycerin, assist them in taking it․ Be prepared to initiate CPR if the person becomes unresponsive and stops breathing normally․
Stroke Identification
Rapid identification of stroke symptoms is paramount for effective treatment․ Utilize the “FAST” acronym: Face – ask the person to smile; does one side droop? Arms – can they raise both arms equally? Speech – is their speech slurred or strange? Time – if you observe any of these signs, call emergency services immediately․
Other potential stroke symptoms include sudden numbness or weakness of the face, arm, or leg, especially on one side of the body; sudden confusion, trouble speaking, or understanding speech; and sudden trouble seeing in one or both eyes․ A severe headache with no known cause is also a warning sign․
Time is critical during a stroke․ Note the time when symptoms first appeared, as this information is vital for medical professionals․ Do not give the person anything to eat or drink․ Remain calm and reassure them while awaiting emergency medical assistance․
Allergic Reactions & Anaphylaxis
Allergic reactions range from mild to severe, with anaphylaxis being a life-threatening emergency․ Mild reactions may include skin rashes, itching, or hives․ More severe reactions can involve swelling of the face, lips, tongue, or throat, difficulty breathing, wheezing, and dizziness․
Anaphylaxis requires immediate epinephrine administration (EpiPen) if available, followed by calling emergency services․ Assist the person in using their auto-injector if they cannot do so themselves․ Even after epinephrine is administered, transport to a hospital is crucial, as symptoms can return․
If someone is experiencing anaphylaxis and doesn’t have an EpiPen, call emergency services immediately․ Keep the person calm and lying flat with their legs elevated, unless they are having difficulty breathing, in which case allow them to sit up․ Monitor their breathing and pulse until help arrives․
Legal Considerations & Documentation
Good Samaritan Laws offer legal protection to individuals providing emergency assistance, while accurate incident reporting is vital for documentation and quality improvement․
Good Samaritan Laws
Good Samaritan Laws are designed to protect individuals who voluntarily provide assistance to others in emergency situations․ These laws generally offer legal protection from liability if you act in good faith, without expecting compensation, and your actions are within the scope of your training․ However, it’s crucial to understand that these laws aren’t absolute and vary by location․
Typically, protection is granted as long as you don’t act recklessly or negligently․ This means providing care within the boundaries of your certification – for example, performing CPR and first aid techniques as you’ve been trained․ Abandoning a victim once you’ve begun assistance could also potentially negate protection․
Understanding your local Good Samaritan laws is essential․ While these laws encourage intervention, they don’t require you to provide assistance․ Knowing your rights and limitations empowers you to respond confidently and legally in an emergency․

Incident Reporting
Thorough incident reporting is a critical component of emergency response, even after the immediate crisis has passed․ Accurate documentation provides a record of the event, the care provided, and the victim’s condition, which can be invaluable for follow-up care, legal purposes, and quality improvement initiatives․
A comprehensive report should include details like the date, time, and location of the incident, a clear description of what happened, the assistance given (CPR, first aid, AED use), and the victim’s response to treatment․ Names and contact information of witnesses and responding personnel should also be recorded․
Many organizations have specific incident reporting forms or procedures․ Familiarize yourself with these protocols․ Maintaining confidentiality and objectivity in your report is paramount․ Accurate and detailed reporting contributes to a safer environment and improved emergency preparedness․
Resources & Further Training
ASHI (American Safety and Health Institute) offers comprehensive training and certification; renewal courses are vital to maintain proficiency in life-saving skills․
ASHI (American Safety and Health Institute) Information
The American Safety and Health Institute (ASHI) is a nationally recognized leader in providing comprehensive safety and emergency care training programs․ As an accredited training center, ASHI offers courses in CPR, AED, and Basic First Aid, designed to equip individuals with the skills and knowledge to respond effectively to various medical emergencies․
ASHI courses are developed and regularly updated to align with the latest guidelines and best practices established by leading medical organizations․ Their curriculum emphasizes hands-on practice and real-world scenarios, ensuring participants gain confidence in their abilities․ The EH&S Office proudly serves as an ASHI training center, providing accessible and affordable training to the community․ A nominal fee covers essential supplies and certification materials․
ASHI certifications are typically valid for two years, after which refresher courses are recommended to maintain competency․ Detailed information regarding course schedules, registration procedures, and certification requirements can be found on the official ASHI website․
CPR/AED Certification Renewal
Maintaining current certification in CPR and AED is vital for ensuring continued competence in life-saving skills․ Most CPR/AED certifications, including those offered through ASHI (American Safety and Health Institute), are valid for a period of two years․ After this period, renewal training is required to refresh knowledge and practice essential techniques․
Renewal courses typically focus on reviewing core concepts, updates to guidelines, and hands-on practice with both CPR and AED devices․ These courses are designed to be efficient and convenient, allowing individuals to quickly regain confidence and stay prepared for emergency situations․ Regular refresher training reinforces proper procedures and addresses any changes in best practices․
To renew your certification, contact an ASHI-authorized training center or explore online renewal options․ Ensure the renewal course meets the requirements for your specific certification and employer, if applicable․ Proactive renewal demonstrates a commitment to emergency preparedness and the ability to respond effectively when seconds count․
Related Posts

how to compact soil manually
Ready to master manual soil compaction? Our comprehensive guides provide step-by-step instructions and expert tips for creating a firm, stable base for any project. Download your PDF manual and build with confidence!

nikon n80 camera manual
Lost your Nikon N80 camera manual? Find a clear, downloadable PDF guide right here! Get back to taking amazing photos fast. Troubleshooting & tips included!

quality manual template
Need a polished quality manual? Grab our free, customizable templates! Streamline your processes & impress. Download now at GuidePlanetPDF – it’s a game changer! ✨