shatterpoint build instructions
Shatterpoint Build Instructions: A Comprehensive Guide
Embark on a journey to expertly assemble your Shatterpoint miniatures! This guide details step-by-step instructions, covering everything from unboxing to painting, ensuring a flawless tabletop experience.
Welcome to the world of Shatterpoint, a thrilling miniatures skirmish game set within the Star Wars universe! This game, from Atomic Mass Games, pits iconic characters against each other in dynamic battles. Before diving into gameplay, assembling your miniatures is crucial. This guide provides a comprehensive walkthrough, catering to both novice and experienced model builders.
Prepare for an immersive experience, as you bring legendary Jedi and formidable Dark Side operatives to life. Detailed assembly guides and helpful tips will ensure your units are ready for galactic conflict.
Unboxing and Inventory
Carefully open your Shatterpoint core set, taking note of all included components. You should find multiple sprues containing miniature parts, scenic bases, and a rulebook. Cross-reference the contents with the included inventory list to ensure everything is present. Pay close attention to smaller pieces, as they can easily be overlooked.
Organize the sprues and bases for efficient assembly. Identifying each component before starting will streamline the building process and prevent confusion later on. A thorough inventory is the first step to a successful build!
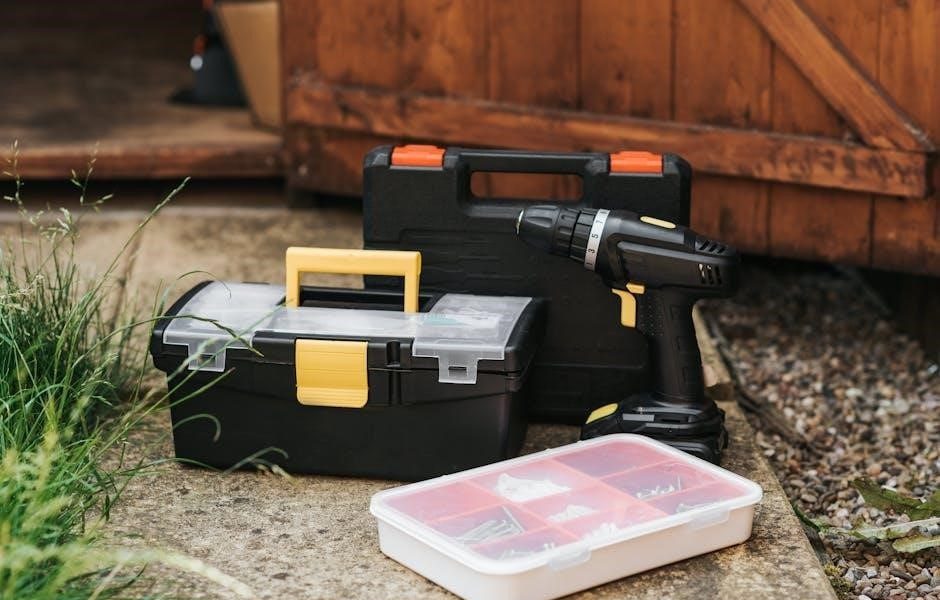
Tools Required for Assembly
Successful miniature assembly demands the right tools! Essential tools include sprue cutters for cleanly removing parts, a hobby knife for cleaning mold lines, and plastic glue specifically designed for polystyrene models. Consider a pin vise for drilling connection points for added durability.
Optional tools like a sculpting tool can aid in gap filling, while a magnifying glass assists with detail work. Investing in quality tools will significantly improve your building experience and the final result.

Essential Tools
For basic Shatterpoint assembly, three tools are paramount. Firstly, sprue cutters are vital for cleanly separating miniature components from the plastic frame, preventing damage. Secondly, a sharp hobby knife is crucial for removing mold lines – the faint lines left from the molding process.
Finally, plastic cement (glue) specifically formulated for polystyrene is necessary to bond the parts together, creating a strong and lasting connection. These tools form the foundation of your building process.
Optional Tools for Enhanced Building
To elevate your Shatterpoint builds, consider these additions. A pin vise and drill bits allow for pinning – reinforcing joints with small rods for extra durability. Files and sanding sticks refine surfaces, smoothing imperfections beyond knife work.
Mold line removers offer precision, while super glue provides faster bonding for smaller details. Finally, a hobby magnifying glass aids in intricate work, ensuring accuracy and a professional finish.
Preparing the Miniatures
Before assembly, careful preparation is crucial. Begin by removing parts from the sprue using clippers, ensuring clean cuts to avoid stressing the plastic. Next, meticulously clean mold lines – thin ridges left from the molding process – with a hobby knife or dedicated mold line remover.
This step dramatically improves the miniature’s appearance and paint adhesion, resulting in a higher quality finished model.
Removing Parts from Sprue
Carefully clip components from the sprue using sharp hobby clippers. Avoid twisting or forcing parts, as this can cause breakage or damage delicate details. Cut slightly away from the component itself, leaving a small amount of plastic attached for easier cleanup. Prioritize safety; always cut away from yourself and wear eye protection.
Proper sprue removal is the foundation for a smooth assembly process.

Cleaning Mold Lines
Identify subtle lines on miniature surfaces – these are mold lines from the manufacturing process. Employ a hobby knife or mold line remover to gently scrape away these imperfections. Exercise caution to avoid removing crucial details during cleanup. Work slowly and methodically, using light pressure for optimal results.
Removing mold lines significantly enhances the final appearance of your Shatterpoint miniatures.
Base Assembly
Begin by selecting appropriate bases for your Shatterpoint miniatures, considering the terrain and aesthetic you desire. Carefully apply a small amount of plastic glue to the miniature’s base connector. Position the miniature centrally on the base, ensuring a secure and stable attachment.
Allow the glue to dry completely before proceeding to decoration. Enhance the bases with texture paints, static grass, or other scenic elements for a personalized touch.
Attaching Miniatures to Bases
Ensure a strong bond by lightly sanding both the miniature’s foot/base joint and the base itself. Apply a precise amount of plastic glue – too much causes mess, too little weakens the hold. Center the miniature carefully, checking alignment from multiple angles before the glue sets.
Hold the miniature firmly in place for 30-60 seconds to guarantee initial adhesion. Allow ample drying time (several hours) before handling or painting to prevent dislodging.
Base Decoration Techniques
Elevate your Shatterpoint battlefields with textured bases! Apply sand, gravel, or flocking using PVA glue for realistic terrain. Create rocky surfaces with cork or small stones, securing them with adhesive. Drybrush textures with contrasting colors to highlight details and add depth.
Consider thematic elements – foliage for forests, debris for urban settings. Utilize static grass for a vibrant, natural look. Seal the decorations with varnish to prevent chipping during gameplay.
Core Set Miniature Assembly ― Jedi

Begin assembling your Jedi heroes! Carefully remove Luke Skywalker and Obi-Wan Kenobi miniatures from their sprues, cleaning mold lines with a hobby knife. Follow the provided diagrams for correct arm and weapon attachment. Ensure a secure fit with plastic glue, avoiding excess application.
Pay attention to detail during lightsaber assembly. Test fit parts before gluing. Allow sufficient drying time before handling, preparing these iconic characters for battle!
Luke Skywalker Build Guide
Start with Luke’s legs and torso, ensuring a seamless connection. Attach his arms, paying close attention to the hand positioning for lightsaber wielding. Carefully assemble the lightsaber hilt and blade, using plastic glue for a strong bond. Consider dynamic posing options during assembly.
Remember to clean any mold lines on his clothing or face. Allow the glue to fully dry before proceeding to base attachment, preparing Luke for galactic conflict!
Obi-Wan Kenobi Build Guide
Begin assembling Obi-Wan by joining his legs and torso, ensuring proper alignment. Attach his arms, focusing on natural posing for Force abilities. Carefully construct his lightsaber, securing the blade with precision. Consider a contemplative stance reflecting his Jedi Master status.
Remove mold lines from his robes and head. Allow sufficient drying time before mounting him on his base, readying him to command the battlefield!
Core Set Miniature Assembly ⏤ Dark Side
Unleash the power of the Dark Side! This section guides you through assembling the sinister forces within the Shatterpoint core set. Prepare to build iconic villains, starting with meticulous sprue removal and cleaning of mold lines. Focus on dynamic poses that capture their menacing presence.

Expect detailed construction for Darth Vader and Kylo Ren, requiring patience and precision. Follow the guides for a truly imposing army!
Darth Vader Build Guide
Assemble the iconic Darth Vader with precision! Begin by carefully removing his parts from the sprue, paying close attention to the intricate details of his armor. Ensure a clean finish by meticulously removing mold lines with a hobby knife.
Connect the legs, torso, and arms, then attach his cape for a dramatic effect. Finally, secure his helmet, completing the imposing figure of the Dark Lord of the Sith!
Kylo Ren Build Guide
Construct Kylo Ren, the conflicted Supreme Leader! Start by detaching his components from the sprue, handling the delicate lightsaber hilt with care. Remove any lingering mold lines for a pristine appearance.
Join the legs, torso, and arms, then carefully attach his unique helmet and shoulder pauldrons. Position his lightsaber, creating a dynamic pose that captures his volatile energy. Complete the build with his flowing robes!
Advanced Assembly Techniques
Elevate your Shatterpoint builds with these expert techniques! Master gap filling using modeling putty to create seamless joins. Smooth surfaces with fine files for a professional finish.
Explore dynamic posing by carefully adjusting limb positions before the glue sets. Consider pinning for added strength with heavier components. Practice these skills to transform your miniatures into stunning, battle-ready figures!

Gap Filling and Smoothing
Address those pesky gaps! Apply a small amount of modeling putty – Milliput or Green Stuff work well – to fill any spaces between parts. Use a sculpting tool or moistened brush to smooth the putty flush with the surrounding surface.
Once dry, gently file away any excess putty with a fine file; Follow with light sanding for an ultra-smooth finish, preparing your miniature for priming and painting.
Posing and Dynamic Assembly

Elevate your Shatterpoint miniatures beyond static poses! Experiment with different arm and leg positions before gluing. Consider the character’s personality and the flow of combat when choosing a dynamic stance.
Dry-fit parts repeatedly to visualize the final pose. Subtle adjustments can dramatically improve the miniature’s impact. Remember to maintain balance and stability for a visually compelling and playable model.
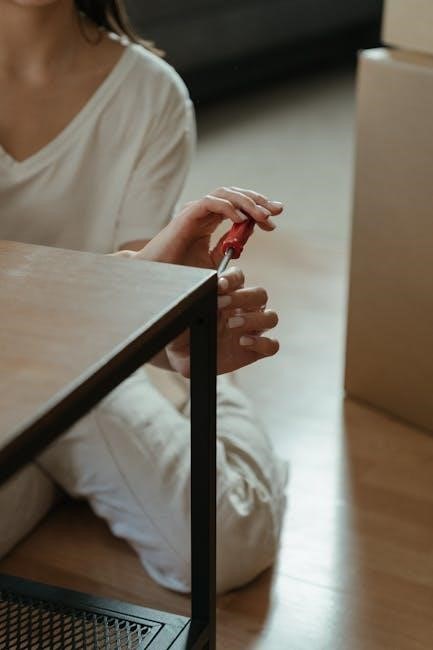
Glue Selection and Application
Choosing the right adhesive is crucial for Shatterpoint miniatures. Plastic polystyrene glue works well for the plastic components, creating a strong bond. Super glue (cyanoacrylate) is useful for metal or resin parts, offering a quick set.
Apply glue sparingly to avoid messy overflows. Use a toothpick or applicator for precise placement. Hold parts firmly together until the glue sets, ensuring a secure connection. Proper application prevents weak points.
Types of Glue for Shatterpoint Miniatures
Plastic polystyrene glue is ideal for the core set’s plastic sprues, chemically welding the parts. Super glue (cyanoacrylate) excels with resin or metal components, offering rapid adhesion. Consider plastic-safe super glue for mixed materials.
UV-curing resin provides a strong, clear bond, but requires a UV lamp. Gap-filling super glues are useful for imperfect fits. Always test glue on a spare part first to ensure compatibility and avoid damage.
Proper Glue Application Techniques
Apply glue sparingly using a toothpick or fine applicator to prevent overflow. Ensure surfaces are clean and dry for optimal bonding. Hold parts firmly together for the recommended time – typically 30-60 seconds for super glue.
Avoid excessive pressure, which can displace the glue. Use clamps or tape for larger assemblies. Clean excess glue immediately with a suitable solvent, being mindful of plastic types.
Painting Preparation
Begin with a thorough cleaning of assembled miniatures to remove any residue. Apply a consistent, even coat of primer – spray primers are recommended for ease of use. Choose a primer color appropriate for your scheme; black for darker tones, white for brighter ones.
Allow the primer to fully dry before undercoating. Consider zenithal highlighting for enhanced depth and detail during painting. Ensure good ventilation during priming and painting processes.
Priming the Miniatures
Priming is crucial for paint adhesion and a smooth finish. Spray primers offer the most consistent coverage; shake well before use. Apply in short, even bursts, avoiding thick coats that obscure detail. Black primer enhances shadows, while white brightens highlights.
Allow each coat to dry completely before applying another. Ensure adequate ventilation and consider using a primer specifically designed for plastic miniatures. Inspect for missed spots and reapply as needed.
Undercoating for Specific Color Schemes
Strategic undercoating elevates painting results. For Jedi, a light grey undercoat provides a neutral base for vibrant robes and metallic hilts. Dark Side miniatures benefit from a dark brown or black undercoat, deepening shadows and enhancing menacing tones.
Consider zenithal highlighting – applying a white spray from above – to pre-shade and define details. Experiment with different colors to achieve unique effects and tailor the undercoat to your desired aesthetic.
Resources and Guides
Expand your knowledge with readily available resources! Atomic Mass Games provides official assembly guides, ensuring accuracy. Explore community-created build logs and tutorials – Tabletop Gaming and dedicated forums offer invaluable insights.
Rob Burman’s guides are highly recommended for detailed instructions. Shatterpoint Guides offer further assistance. Utilize these platforms to learn advanced techniques, troubleshoot issues, and connect with fellow hobbyists for collaborative learning.
Official Shatterpoint Assembly Guides
Atomic Mass Games, the creators of Shatterpoint, offer comprehensive official assembly guides. These resources are designed to provide clear, concise instructions for each miniature within the core sets and expansions.
Access these guides through their official website and associated online platforms. They detail each step, ensuring accurate construction and a smooth building process. Refer to these guides as your primary source for official instructions and best practices.
Community-Created Build Logs and Tutorials
Beyond official guides, a vibrant Shatterpoint community shares build logs and tutorials online. Platforms like Tabletop Gaming and various forums host detailed guides, showcasing techniques and offering solutions to common assembly challenges.
Explore these resources for alternative approaches, posing ideas, and advanced building tips. Community content often features helpful videos and step-by-step photos, enhancing your miniature assembly experience and inspiring creativity.
Troubleshooting Common Assembly Issues
Encountering difficulties is common during miniature assembly. Addressing issues like difficult parts or broken pieces requires patience and the right approach. Carefully examine connection points, ensuring proper alignment before applying glue.
For broken pieces, use plastic cement to reattach them, supporting the joint until fully cured. Don’t force connections; gentle adjustments and precise glue application are key to a successful repair and a sturdy miniature.
Dealing with Difficult Parts
Some Shatterpoint parts may require extra care during assembly. Often, these involve small, intricate details or tight-fitting connections. Employ a hobby knife to carefully clear any lingering plastic from connection points, ensuring a smooth fit.
Gentle pressure and patience are crucial; avoid forcing parts together. Consider using a pin vise to drill small holes for pinning, providing extra stability for challenging joins and preventing breakage.
Fixing Broken Pieces
Accidents happen! If a Shatterpoint miniature piece breaks, don’t despair. Plastic glue is your first line of defense; apply sparingly to the broken surfaces and hold firmly until bonded. For cleaner breaks, consider using a tiny amount of super glue, but be cautious.
Pinning broken sections with a small piece of wire provides significant reinforcement. Gap filling with modeling putty can conceal the repair, followed by careful smoothing for a seamless finish.
Displaying Your Built Miniatures
Showcase your Shatterpoint forces with pride! Protective cases shield miniatures from dust and damage, preserving their painted detail. Consider creating immersive dioramas using terrain materials – bases become battlefields.
Arrange miniatures dynamically, recreating iconic scenes or preparing for the next game. Proper lighting enhances details, while thoughtful placement tells a story. Invest in quality display stands for dynamic posing and secure presentation.
Protective Cases and Storage
Safeguard your meticulously built Shatterpoint miniatures with dedicated storage solutions. Acrylic cases offer excellent visibility and dust protection, preserving paint jobs. Foam-lined carrying cases prevent movement damage during transport to game nights.
Organize miniatures by faction or unit type for easy access. Consider stackable storage boxes to maximize space. Avoid direct sunlight exposure, which can fade colors over time, ensuring longevity.

Creating Dioramas
Elevate your Shatterpoint miniatures beyond the tabletop with immersive dioramas! Utilize scenic materials like sand, rocks, and foliage to recreate iconic Star Wars landscapes. Incorporate 3D-printed terrain or repurposed objects for unique environments.
Consider the narrative – depict a pivotal moment from the Shatterpoint universe. Experiment with lighting effects to enhance the atmosphere and showcase your miniatures dramatically. Dioramas add a captivating display element.
Related Posts

delta 6-in-1 convertible crib instructions
Struggling with Delta 6-in-1 crib instructions? Don’t panic! Find clear, easy-to-follow guides & manuals right here. Get your little one sleeping soundly, faster!

tara tainton jerk off instruction
Discover amazing vegan recipes for every meal! From quick weeknight dinners to decadent desserts, find easy plant-based options to delight your taste buds.

or-asc instructions
Need help with your OR-ASC? Find clear, concise instructions & safety guidelines right here! Download the PDF and get operating smoothly. Simple & effective!