sharpening angle guide
Sharpening angle guides are invaluable tools for both novice and experienced users, ensuring consistent blade edges. They simplify maintaining the correct angle during sharpening.
These guides help achieve optimal performance and longevity for various knife types, from kitchen tools to specialized blades, offering precision and ease of use.
Maintaining a consistent angle is crucial for effective sharpening, and these guides provide a reliable method for achieving that, improving edge quality and retention.
What is a Sharpening Angle Guide?
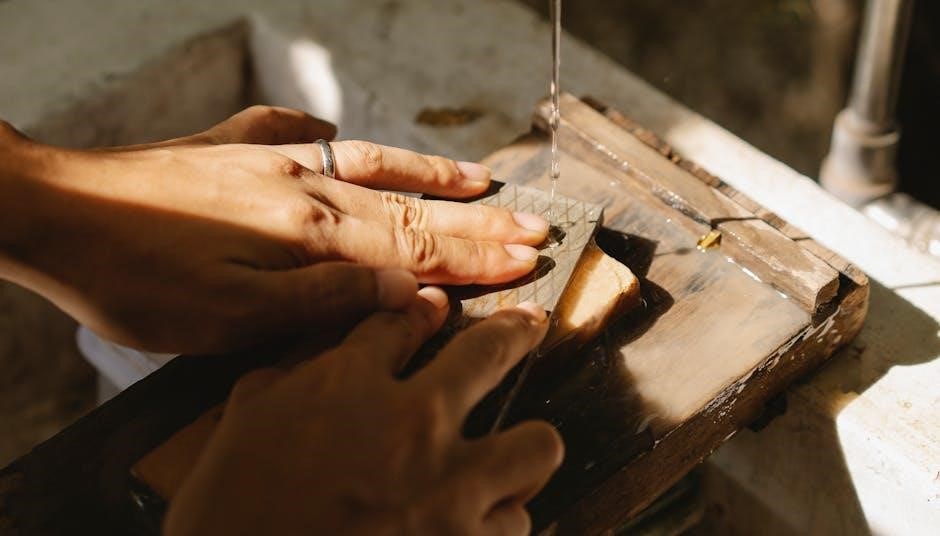
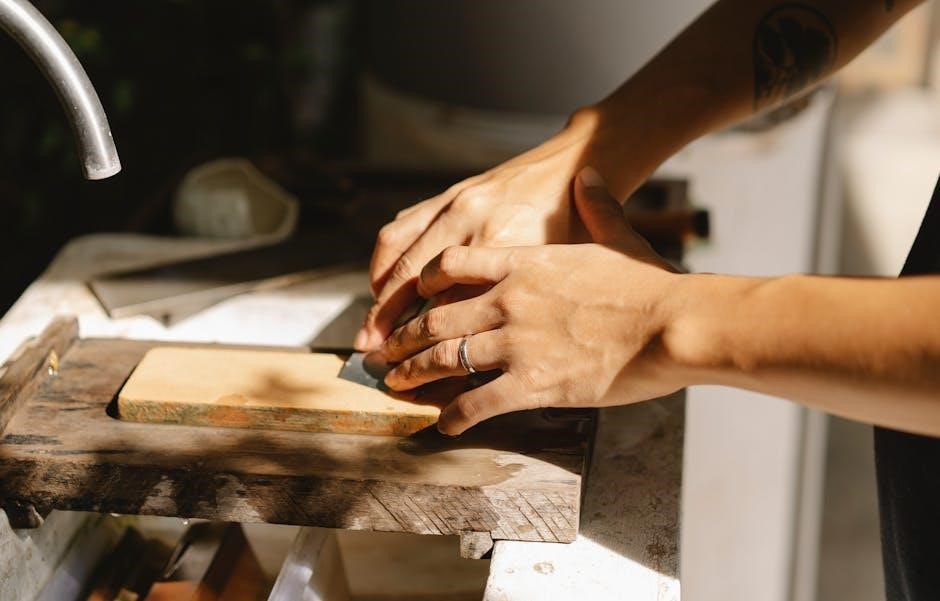
Sharpening angle guides are tools designed to assist in maintaining a consistent angle while sharpening a blade. They come in various forms, including magnetic attachments, clip-on devices, and integrated systems. Essentially, they act as a reference point, ensuring the sharpening stone or surface meets the blade at the desired angle throughout the sharpening process.
These guides are particularly helpful for beginners who may struggle to freehand a consistent angle. However, even experienced sharpeners can benefit from the precision they offer. They help eliminate guesswork and promote a uniform bevel along the entire edge of the blade. The goal is to achieve a sharp, durable edge by consistently replicating the correct angle.
Different guides cater to different sharpening methods and blade geometries, offering versatility for various knife types and sharpening preferences.
Why Use a Sharpening Angle Guide?
Employing a sharpening angle guide offers significant advantages, primarily ensuring consistent results. Maintaining a precise angle is paramount for achieving a sharp, durable edge, and guides eliminate the inconsistencies of freehand sharpening. This is especially beneficial for beginners learning the technique, reducing frustration and improving outcomes.
Using a guide promotes a uniform bevel, crucial for optimal blade performance and longevity. It minimizes the risk of creating an uneven or weak edge. Furthermore, guides save time and effort by streamlining the sharpening process; They allow you to focus on technique rather than constantly monitoring the angle.
Ultimately, a guide empowers you to sharpen your knives like a professional, regardless of your experience level.

Understanding Sharpening Angles
Sharpening angles dictate edge durability and sharpness; smaller angles create sharper edges, while larger angles offer greater robustness. Precision is key for optimal blade function.
The Importance of Consistent Angles
Maintaining a consistent sharpening angle is paramount for achieving a uniform and effective blade edge. Variations in angle lead to an uneven bevel, compromising the knife’s performance and longevity. A consistent angle ensures the entire edge is sharpened equally, resulting in a smooth, clean cut.
Without a guide, achieving this consistency can be challenging, especially for beginners. Inconsistent angles create weak points in the edge, making it prone to chipping or rolling. Sharpening angle guides address this issue by providing a reliable reference point, simplifying the process and guaranteeing a more professional result.
Ultimately, a consistent angle translates to improved cutting efficiency, enhanced edge retention, and a safer, more enjoyable sharpening experience. It’s the foundation of a well-maintained blade.
How Sharpening Angle Affects Blade Performance
The sharpening angle directly influences a blade’s cutting ability and durability. Shallower angles (around 15 degrees) create incredibly sharp edges, ideal for slicing through soft materials, but are more prone to chipping. Steeper angles (20-25 degrees) produce a more robust edge, better suited for tougher tasks and resisting deformation, though with reduced initial sharpness.
A correctly chosen angle balances sharpness and durability. Using an angle guide ensures this balance is achieved. The edge geometry dictates how the blade interacts with the material being cut; a precise angle maximizes efficiency and minimizes resistance.
Understanding this relationship is crucial for selecting the appropriate angle for each knife type and intended use, optimizing performance and extending the blade’s lifespan.
Sharpening Angle vs. Edge Angle
The sharpening angle refers to the angle at which you draw the blade across the sharpening stone, creating the bevel. The edge angle, however, is the final angle formed on the blade’s cutting edge itself. These aren’t always the same, especially when using a micro-bevel.
When sharpening, you’re essentially creating or refining the edge angle. An angle guide helps maintain consistency during this process. A common mistake is assuming the sharpening angle is the edge angle, neglecting the slight variations that occur during stone contact.
Understanding this distinction is vital for achieving a precise and functional edge. A properly executed sharpening process results in a desired edge angle, maximizing cutting performance and durability.
Common Sharpening Angles for Different Knife Types
Knife sharpening angles vary significantly based on intended use; kitchen knives typically range from 15-20 degrees, while outdoor knives benefit from 20-25 degrees for durability.
Kitchen Knives: Recommended Angle Range (15-20 degrees)
Kitchen knives generally thrive with a sharpening angle between 15 and 20 degrees. This range strikes a balance between sharpness and edge durability, ideal for everyday food preparation tasks.
A 15-degree angle creates an exceptionally sharp edge, perfect for slicing delicate ingredients, but may require more frequent honing. Conversely, a 20-degree angle offers increased robustness, better suited for chopping and handling tougher foods.
Most Western-style kitchen knives benefit from the 20-degree mark, while Japanese knives often utilize the lower end of the spectrum, around 15 degrees, for superior slicing ability. Maintaining consistency within this range is key to achieving optimal performance and prolonging the life of your kitchen blades. Using a sharpening angle guide is highly recommended.
Remember, a precise angle ensures a clean, efficient cut and minimizes the risk of rolling the edge during use.
Pocket Knives & EDC Blades: Optimal Angle (17-20 degrees)
Pocket knives and Everyday Carry (EDC) blades typically perform best when sharpened to an angle of 17 to 20 degrees. This range provides a good compromise between sharpness and edge retention, crucial for versatile use.
These blades often encounter a wider variety of tasks than kitchen knives, demanding an edge that can withstand moderate wear and tear. A 17-degree angle offers excellent slicing capabilities, while 20 degrees enhances durability for tougher cutting jobs.
Utilizing a sharpening angle guide is particularly beneficial for pocket knives, ensuring consistent results on smaller, often curved blades. Maintaining this angle prevents premature dulling and maximizes the blade’s lifespan. Consistent sharpening within this range will keep your EDC tool ready for any situation.
Remember, a well-maintained edge is essential for safety and functionality.
Outdoor/Survival Knives: Heavier Duty Angles (20-25 degrees)
Outdoor and survival knives require a more robust edge than everyday blades, making a 20 to 25-degree sharpening angle ideal. This steeper angle prioritizes durability and resistance to chipping, essential when dealing with demanding tasks like batoning wood or processing game.
While sacrificing some initial sharpness, this range ensures the blade can withstand significant stress without catastrophic failure. A sharpening angle guide is highly recommended for maintaining consistency across the blade’s length, especially on larger, fixed-blade knives.
Employing a 20-25 degree angle extends the time between sharpenings in harsh environments. This is critical when access to sharpening tools is limited. Prioritizing edge strength over razor sharpness is a practical choice for reliable performance in the field.
A durable edge is paramount for survival situations.
Japanese Knives: Steeper Angles & Precision (10-15 degrees)
Japanese knives, renowned for their exceptional sharpness, traditionally utilize a steeper sharpening angle, typically between 10 and 15 degrees. This acute angle creates an incredibly fine edge, ideal for precise slicing and delicate food preparation. However, it also makes the edge more fragile and prone to chipping.
A sharpening angle guide is crucial when working with these blades, as maintaining consistent precision is paramount. Even slight variations can significantly impact performance.
Mastering the technique requires patience and a steady hand. While demanding, the resulting edge quality is unparalleled. Regular, careful sharpening is essential to preserve the knife’s exceptional cutting ability. These knives demand a higher level of care and skill.
Precision is key to unlocking their full potential.

Types of Sharpening Angle Guides
Sharpening angle guides come in various forms: magnetic, clip-on, fixed systems, and DIY options. Each offers unique benefits for maintaining consistent blade angles during sharpening.
Selecting the right guide depends on skill level and preferred sharpening method.
Magnetic Angle Guides
Magnetic angle guides are popular for their versatility and ease of use. These guides typically attach to the blade using strong magnets, holding a precise angle throughout the sharpening process. They are compatible with various sharpening stones and systems, offering flexibility for different sharpening preferences.
A key advantage is their adaptability to curved blades, where clip-on guides might struggle. Users can easily adjust the angle, making them suitable for diverse knife types. However, the magnetic hold might not be as secure on all blade types, particularly those with very thin or non-magnetic steel.
Proper placement and ensuring a firm magnetic connection are crucial for accurate results. They are a great entry point for those seeking consistent angles without a significant investment.
Clip-On Angle Guides
Clip-on angle guides offer a straightforward method for maintaining consistent sharpening angles. These guides physically attach to the knife blade, providing a stable reference point during the sharpening process. They are generally affordable and easy to use, making them a popular choice for beginners.
However, their effectiveness can be limited by blade geometry. They work best on blades with flat profiles and may not securely fit curved or heavily profiled knives. Ensuring a snug fit is crucial to prevent slippage and maintain accuracy.
These guides are often made of plastic or metal and come with pre-set angles, or adjustable options. They are best suited for simpler sharpening tasks and may not offer the precision of more advanced systems.
Fixed Angle Sharpening Systems
Fixed angle sharpening systems represent a more sophisticated approach to blade maintenance, offering exceptional consistency and control. These systems typically feature a base with pre-defined slots or guides that lock the blade at a specific angle throughout the sharpening process.
They eliminate much of the guesswork involved in freehand sharpening, making them ideal for achieving highly refined edges. While often more expensive than clip-on guides, they deliver superior results, particularly for precision work.
Many systems allow for angle adjustments, accommodating various knife types. They often incorporate abrasive stones or diamond plates for efficient material removal, ensuring a sharp and durable edge.
DIY Angle Guides – Creating Your Own
For the resourceful knife enthusiast, crafting a DIY sharpening angle guide is a viable and cost-effective option. Numerous online resources, like those found on Reddit (r/sharpening), demonstrate simple methods using readily available materials.
Common approaches involve utilizing felt pads, sandpaper adhered to stable bases, or even strategically placed bolts to establish a consistent angle. These homemade guides provide a surprisingly accurate means of maintaining the correct bevel during sharpening.
While requiring some ingenuity and patience, a DIY solution allows for customization to specific blade geometries and personal preferences, offering a rewarding alternative to commercially produced systems.

Using a Sharpening Angle Guide Effectively
Sharpening angle guides require secure attachment and consistent pressure for optimal results. Regularly check the angle during the process to maintain a uniform bevel.
Attaching and Adjusting the Guide
Proper attachment is paramount when utilizing a sharpening angle guide. Begin by securely fastening the guide to the blade, ensuring it doesn’t wobble or shift during the sharpening process. Magnetic guides clamp onto the blade, while clip-on versions require careful positioning.
Adjustment is key to matching the guide’s angle to your knife’s specific requirements. Most guides offer adjustable settings, often indicated by degree markings. Refer to a knife sharpening angle chart to determine the correct angle for your blade type – kitchen knives typically fall between 15-20 degrees, while outdoor knives may need 20-25 degrees.
Double-check the alignment before commencing sharpening. A misaligned guide will lead to an inconsistent bevel and a less-than-ideal edge. Take your time and ensure a snug, accurate fit for optimal results.
Maintaining Consistent Pressure
Consistent pressure is vital when using a sharpening angle guide. Applying even force across the blade ensures a uniform bevel and prevents uneven wear. Avoid excessive pressure, as this can damage the blade or cause the guide to slip.
A gentle, controlled approach is far more effective than brute force. Let the abrasive material do the work, guiding the blade smoothly along the sharpening surface. Maintain a steady hand and avoid jerky movements.
Monitor the feedback – you should feel the guide gliding smoothly. If you encounter resistance, adjust your pressure or check the guide’s alignment. Consistent pressure, combined with the correct angle, is the foundation of a sharp, durable edge.
Checking Your Angle During Sharpening
Regularly verifying the angle while sharpening with a guide is crucial for accuracy. Even with a guide, slight deviations can occur. Visually inspect the bevel formation frequently, ensuring it’s consistent along the entire blade length.
Pay attention to the feedback – a smooth, even stroke indicates the correct angle. If you feel resistance or notice uneven material removal, immediately reassess the guide’s position and your technique.
Use a marker technique: color the bevel with a permanent marker and observe where material is removed. This reveals if the angle is consistent. Maintaining this vigilance guarantees a precise, sharp edge and maximizes the guide’s effectiveness.
Sharpening Angle Charts & Resources
Comprehensive charts detail optimal angles for diverse blades, while CATRA data correlates angle to edge retention. Online resources further aid precise sharpening decisions.
Comprehensive Knife Sharpening Angle Chart
A detailed knife sharpening angle chart is an essential resource for achieving optimal blade performance. This chart typically categorizes knives by type, providing recommended angle ranges for each. For instance, Western kitchen knives generally benefit from a 15-20 degree angle, balancing sharpness and durability.
Japanese knives, known for their exceptional sharpness, often require steeper angles of 10-15 degrees. Pocket knives and everyday carry (EDC) blades usually perform well within the 17-20 degree range. Heavier-duty outdoor or survival knives can utilize angles between 20-25 degrees for increased robustness.
Remember that these are guidelines; personal preference and intended use can influence the ideal angle. Consulting a chart ensures consistent results and helps maintain the integrity of your blades, maximizing their lifespan and effectiveness.
CATRA Edge Retention and Angle Relationship
CATRA (Combined Assessment of Tools and Related Applications) testing reveals a significant relationship between sharpening angle and edge retention. Generally, smaller angles produce sharper edges initially, but exhibit faster wear. Conversely, larger angles create more durable, albeit less acutely sharp, edges.
The CATRA chart demonstrates that as the total edge angle increases, edge retention improves, but cutting performance diminishes. A balance must be struck based on the knife’s intended purpose. For example, a delicate slicing knife benefits from a smaller angle, prioritizing sharpness, while a robust chopping knife needs a larger angle for durability.
Understanding this relationship allows users to optimize sharpening angles for specific tasks, maximizing both sharpness and longevity, ultimately enhancing the knife’s overall performance.
Online Resources for Angle Selection
Numerous online resources assist in selecting the optimal sharpening angle for various knife types. Websites like Reddit’s r/sharpening offer community-driven advice and discussions on angle selection, providing practical insights from experienced sharpeners.
Dedicated knife sharpening blogs and forums frequently feature detailed angle charts tailored to specific blade geometries and intended uses. These resources often categorize knives by type – kitchen, pocket, outdoor – and recommend corresponding angle ranges.
YouTube channels specializing in knife sharpening demonstrate techniques and explain the rationale behind different angle choices. Exploring these platforms can provide visual guidance and a deeper understanding of the sharpening process.

Troubleshooting Common Issues
Sharpening angle guides can slip, causing inconsistent bevels. Addressing this requires secure attachment and consistent pressure, adapting to diverse blade shapes for optimal results.
Guide Slipping During Sharpening
Guide slippage is a frequent frustration when using sharpening angle guides. Several factors contribute to this issue, and addressing them is key to successful sharpening. First, ensure the guide is securely attached to the blade; a loose fit immediately compromises stability.
Applying consistent, moderate pressure is vital. Excessive force doesn’t improve sharpening and actually increases the likelihood of slippage. Conversely, too little pressure won’t maintain contact.
The blade’s surface condition also plays a role. Oil or debris can create a slippery interface. Clean both the blade and the guide thoroughly before starting. Finally, consider the guide’s design; some are inherently more stable than others, particularly those with robust clamping mechanisms.
Experiment with different guide types to find one that suits your sharpening style and blade geometry.
Achieving a Consistent Bevel
A consistent bevel is the hallmark of a well-sharpened knife, and sharpening angle guides significantly aid in its creation. Maintaining a uniform angle throughout the entire sharpening process is paramount. Slow, deliberate strokes are far more effective than hurried ones, allowing for greater control.
Regularly check your progress by visually inspecting the bevel as you sharpen. Look for evenness and symmetry on both sides of the blade. A marker can be used to highlight the bevel, revealing areas needing more attention.
Consistent pressure is also crucial; varying pressure leads to an uneven bevel. Practice and patience are key to mastering this skill, and a quality guide provides the necessary stability and reference point.
Remember, a consistent bevel equals a lasting, effective edge.
Dealing with Different Blade Shapes
Sharpening angle guides offer versatility, but adapting to diverse blade shapes requires technique. Curved blades, like those found on some kitchen knives, demand careful maneuvering to maintain consistent contact with the guide. Adjust your grip and stroke to follow the curve.
Blades with a pronounced belly, such as a chef’s knife, necessitate breaking the sharpening into sections. Focus on smaller areas at a time, ensuring the guide remains stable against the blade’s curvature.
For blades with complex profiles, a flexible guide or a system allowing angle adjustment is invaluable. Experimentation and practice are essential for mastering these nuances, achieving a uniformly sharp edge across all blade geometries.
Remember, adaptability is key!

Advanced Sharpening Techniques & Angle Considerations
Sharpening angle guides facilitate exploring convex grinds and micro-bevels, enhancing edge retention. Adjusting angles for push or draw cuts optimizes performance for specific tasks.
Convex vs. Flat Grinds & Angle Adjustment
Sharpening angle guides become particularly important when dealing with different blade grinds. Flat grinds, common in many Western knives, benefit from consistent angle maintenance throughout the sharpening process, typically using a guide to ensure uniformity.
However, convex grinds, often found in outdoor and some Japanese blades, require a slightly different approach. A sharpening angle guide can still be used, but adjustments are needed. Instead of maintaining a single, fixed angle, you’ll subtly round the angle as you move along the blade’s curve.
This rounding action mimics the original convex shape. Using a guide helps prevent creating a flat spot. Experimentation is key, and observing the blade’s geometry is crucial for successful convex grind sharpening. Remember, the goal is to restore, not alter, the existing grind.
Micro-bevels and Their Impact on Edge Retention
Sharpening angle guides facilitate the creation of micro-bevels, a subtle refinement to the blade’s edge. A micro-bevel is a very small, slightly steeper angle created at the very edge of the blade, enhancing durability.
While a larger sharpening angle increases robustness, it can reduce initial sharpness. A micro-bevel combines the best of both worlds – a relatively acute primary bevel for sharpness, and a tougher micro-bevel for edge retention.
Using a guide ensures this micro-bevel is consistent and precise. It effectively thickens the very edge, making it less prone to chipping or rolling. This is especially beneficial for knives used in demanding tasks. Properly executed, a micro-bevel significantly extends the time between sharpenings.
Sharpening Angles for Specific Tasks (Push Cut vs. Draw Cut)
Sharpening angle guides are crucial when tailoring blade angles to cutting techniques. “Push cuts,” involving direct downward pressure, benefit from slightly steeper angles (18-20 degrees) for increased durability and resistance to rolling.
Conversely, “draw cuts,” where the blade is pulled across the material, often perform better with shallower angles (15-17 degrees). Shallower angles create a thinner, sharper edge ideal for slicing through materials with minimal resistance.
Using a guide allows precise adjustment for these nuances. A steeper angle for push cuts maintains the edge longer, while a shallower angle for draw cuts maximizes slicing efficiency. Understanding your primary cutting style and utilizing an angle guide accordingly optimizes performance.
Related Posts
asvab mechanical study guide
Struggling with the ASVAB Mechanical Comprehension? This guide breaks down tricky concepts with clear explanations & practice questions. Boost your score now!
seidel’s guide to physical examination 10th edition pdf free
Need the latest Seidel’s Guide to Physical Examination? Download the 10th edition PDF for free! Perfect for students & healthcare pros. Access now!

cowin e7 user guide
Unlock the full potential of your Cowin E7 headphones! Our easy-to-follow guide covers everything from pairing to troubleshooting. Download now & enjoy!