
e36 automatic to manual swap
E36 Automatic to Manual Swap: A Comprehensive Guide
Embarking on an E36 automatic to manual conversion is a popular modification, offering enhanced driver engagement and control. This guide details the process,
leveraging community knowledge and diagnostic tools like ISTA and INPA for a successful swap.
The E36 generation BMW is a beloved platform, and converting from an automatic to a manual transmission is a frequently undertaken modification. This swap dramatically alters the driving experience, providing a more connected and engaging feel behind the wheel. Many enthusiasts pursue this upgrade to recapture the original spirit of the E36, or simply to enjoy the greater control a manual gearbox offers.
Successfully completing this conversion requires careful planning, sourcing the correct parts, and a solid understanding of the process. Online resources, like those found on Bimmerfest forums, are invaluable for guidance and troubleshooting. Diagnostic tools such as ISTA and INPA become crucial for post-swap adjustments and resolving any electrical or communication issues that may arise during the process.
Why Swap? Benefits of a Manual Transmission
Switching to a manual transmission in your E36 unlocks a more visceral driving experience. Enthusiasts often cite increased driver engagement and a stronger connection to the vehicle as primary benefits. A manual gearbox allows for precise gear selection, offering greater control during spirited driving and track use. Beyond the driving feel, a manual swap can potentially improve fuel efficiency, though this varies based on driving style.
Furthermore, a manual transmission eliminates the parasitic losses inherent in an automatic, potentially freeing up a small amount of horsepower. For those pursuing engine swaps, like the popular M50/M54 conversions, a manual transmission is often considered essential to fully realize the engine’s potential and maintain the car’s balance.
Planning the Swap: Initial Considerations
Before diving into the E36 manual swap, meticulous planning is crucial. Assess your mechanical skills honestly; this isn’t a beginner project. Thoroughly research the parts required and understand the scope of the electrical modifications needed, particularly addressing the Automatic Transmission Control Unit (ATCU). Consider whether you’ll tackle the swap independently or seek professional assistance.
Evaluate your driving style and intended use for the car. This will influence decisions regarding the final drive ratio and clutch selection. Document everything – create a checklist, track expenses, and photograph each step for reference during reassembly and troubleshooting. Proper preparation minimizes downtime and ensures a smoother conversion.
Budgeting for the Conversion
A realistic budget is paramount for a successful E36 manual swap. Costs can quickly escalate, so anticipate unexpected expenses. Core components like the transmission, clutch, pedal assembly, and driveshaft contribute significantly. Factor in fluids, hardware, and potentially, professional machining or welding. Don’t forget diagnostic tools like ISTA, which, while sometimes available for free, may require a paid subscription or one-click installer.
Allocate funds for potential issues – worn bushings, damaged lines, or unforeseen electrical gremlins. Prioritize quality parts; cheaper alternatives may compromise reliability. Research pricing thoroughly and compare quotes from multiple suppliers. A contingency fund of 10-15% is highly recommended.
Sourcing Parts: What You’ll Need
Locating the correct parts is crucial for a smooth E36 manual swap. Begin with a transmission – a used Getrag 250 is a common choice. The pedal assembly, including the clutch pedal, is essential, often sourced from a manual E36. A complete clutch kit (disc, pressure plate, throw-out bearing) is vital. A compatible driveshaft, potentially requiring modification, is also needed.
Consider a shorter throw shifter for improved feel. Don’t overlook smaller items like the clutch master and slave cylinders, and the necessary hardware. Online forums and BMW parts specialists are excellent resources. Check for backorders, as some parts, like power steering reservoirs, can have lengthy lead times.
Essential Parts List
A comprehensive parts list ensures a successful E36 manual conversion. Key components include the manual transmission itself, ideally a Getrag 250 or similar. The pedal assembly – clutch, brake, and gas – is non-negotiable. A complete clutch kit (disc, pressure plate, throw-out bearing) is fundamental. You’ll also require a clutch master cylinder, slave cylinder, and hydraulic lines.
Don’t forget the transmission crossmember, shifter linkage, and a potentially modified driveshaft. Wiring harness modifications necessitate connectors and wire. Diagnostic tools like ISTA/INPA are invaluable for post-swap adjustments. Finally, factor in fluids – transmission oil and brake fluid – for a complete installation.
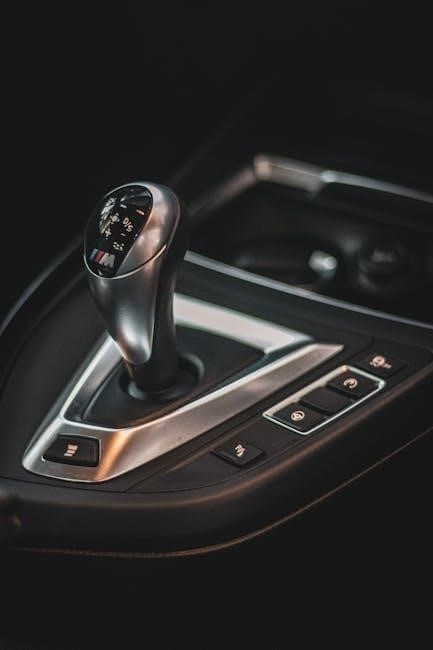
Transmission and Related Components
Selecting the correct transmission is paramount. The Getrag 250 is a common choice for M50/M54 engines, offering robust performance. Ensure compatibility with your engine and differential. Beyond the transmission itself, you’ll need a flywheel specifically designed for manual transmissions. Inspect the transmission mounts for wear and replace if necessary.
Consider a new pilot bearing and rear main seal for the engine during installation. The shifter linkage, including the selector rod and bushings, is crucial for precise gear changes. A transmission crossmember designed for manual swaps is essential for secure mounting. Finally, don’t overlook the transmission output flange.
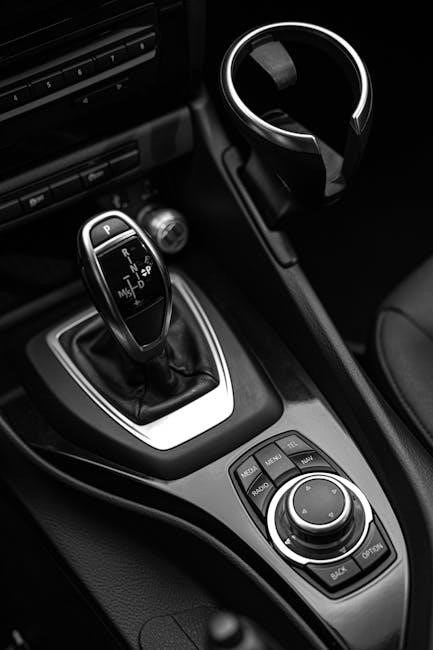
Pedal Assembly and Clutch System
A complete pedal assembly swap is required, sourcing a unit from a manual E36. This includes the clutch pedal, brake pedal, and associated mounting hardware. The clutch master cylinder and slave cylinder are vital components; consider upgrading to stainless steel lines for improved feel. Selecting the right clutch kit – pressure plate, disc, and throw-out bearing – is crucial, matching it to your engine’s torque output.
Ensure the clutch hydraulic lines are in good condition and properly bled after installation. Inspect the clutch fork for wear and replace if needed. Proper clutch adjustment is essential for smooth engagement and preventing premature wear.
Tools Required for the Swap
Successfully completing an E36 manual swap demands a comprehensive toolkit. Essential items include a full socket set, wrenches (metric), torque wrench, breaker bar, and various screwdrivers. Specialized tools like a transmission jack are highly recommended for safe removal and installation. You’ll also need fluid drain pans, jack stands, and wheel chocks for safety.
Diagnostic tools, such as ISTA or INPA, are invaluable for post-swap adjustments and troubleshooting. A clutch alignment tool is critical for proper clutch disc centering. Don’t forget penetrating oil, threadlocker, and safety glasses throughout the process.
Step-by-Step Swap Process
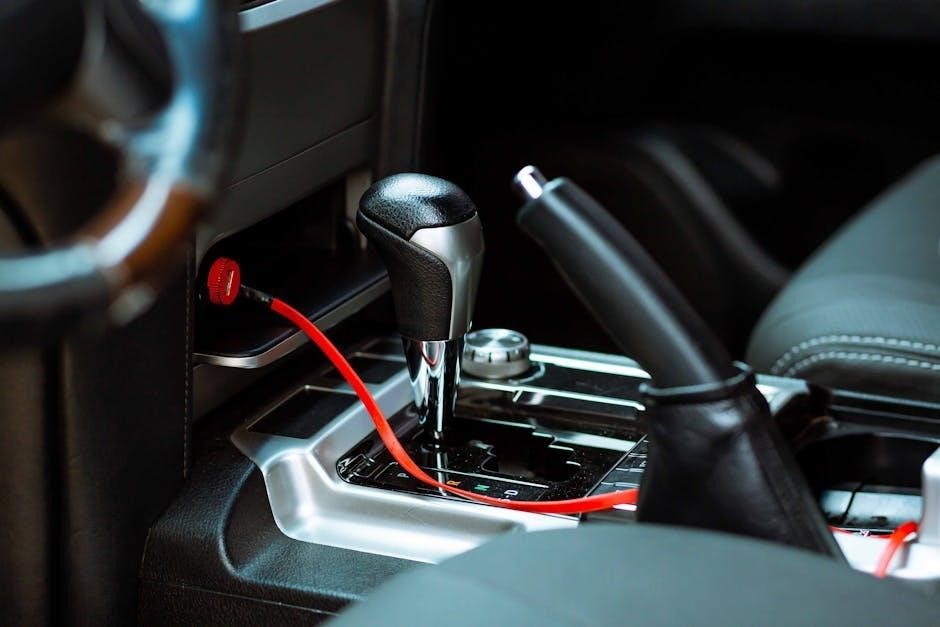
The E36 manual swap begins with safely lifting the vehicle and disconnecting the battery. Next, carefully drain the automatic transmission fluid before removing the driveshaft and exhaust system. Disconnect all wiring and cooling lines connected to the automatic transmission. Support the engine and then remove the transmission mounting bolts.
Lower the automatic transmission using a jack. Install the manual transmission, ensuring proper alignment with the engine. Reconnect all necessary components, including the driveshaft, exhaust, and wiring. Finally, install the clutch pedal assembly and complete the process with fluid refills.
Removing the Automatic Transmission

Begin by safely securing the E36 with jack stands and disconnecting the negative battery terminal. Drain the automatic transmission fluid completely. Disconnect the driveshaft, ensuring you mark its orientation for reinstallation. Remove the exhaust system to gain access to the transmission.
Disconnect all electrical connectors and cooling lines attached to the transmission. Support the engine with a jack and remove the transmission mounting bolts. Carefully lower the automatic transmission using a transmission jack, taking care not to damage any surrounding components. This step requires patience and attention to detail.
Installing the Manual Transmission
With the automatic transmission removed, prepare for the manual transmission installation. Carefully align the manual transmission with the engine, ensuring the input shaft is properly engaged with the clutch disc. Utilize a transmission jack for controlled lifting and positioning. Secure the transmission with the mounting bolts, tightening them to the manufacturer’s specifications.

Reconnect all necessary electrical connectors and the driveshaft, verifying correct orientation; Reinstall the exhaust system, adjusting as needed for clearance. Double-check all connections and mounting points before proceeding. This phase demands precision to avoid future issues.
Wiring and Electrical Modifications
The swap necessitates addressing several wiring and electrical aspects. Disconnect the automatic transmission control unit (ATCU) as it’s no longer needed. Address the reverse light switch, ensuring it functions correctly with the manual transmission – often requiring a new switch or wiring adaptation.
Utilize diagnostic tools like ISTA/INPA to verify proper operation of all systems post-swap. Some models may require coding adjustments to remove automatic transmission-related fault codes. Careful attention to wiring is crucial for a seamless and reliable conversion, preventing electrical gremlins.
Addressing the Reverse Light Switch
The reverse light functionality requires specific attention during the swap. Unlike automatic transmissions, manual transmissions activate the reverse light via a switch on the transmission itself. You’ll likely need to install a new reverse light switch compatible with the manual transmission.
Wiring this switch correctly is vital; improper connection will result in the reverse lights not illuminating when engaged. Ensure the wiring is secure and properly insulated. Testing the switch with a multimeter confirms functionality before final installation. Correct operation is essential for safety and legal compliance.
Dealing with the Automatic Transmission Control Unit (ATCU)
The Automatic Transmission Control Unit (ATCU) must be addressed post-swap. Since you’re removing the automatic transmission, the ATCU is no longer needed and can be removed to declutter the engine bay. However, simply disconnecting it can trigger warning lights on the dashboard.
Ideally, the ATCU should be fully removed and the system coded out using diagnostic software like ISTA or INPA. This eliminates error messages and ensures the car’s systems function correctly. Failing to do so may result in persistent check engine lights or other related issues. Proper coding is crucial for a clean conversion.
Drivetrain Considerations
Post-transmission swap, careful drivetrain assessment is vital. Driveshaft compatibility is a key concern; the automatic and manual transmission outputs differ, often requiring a driveshaft modification or replacement. Ensuring correct length is crucial to avoid vibrations or damage.
Furthermore, consider the differential and final drive ratio. Changing to a manual transmission doesn’t automatically optimize gearing for your driving style. Adjusting the final drive ratio can significantly impact acceleration and top speed. Many enthusiasts explore this, seeking a “poor man’s supercharger” effect, but careful consideration of driving conditions is essential.
Driveshaft Compatibility and Modifications
The E36 automatic and manual transmissions utilize different output flanges, necessitating driveshaft adjustments. Typically, the automatic driveshaft is too long for a manual swap. Options include shortening the existing driveshaft – a professional weld and balance are highly recommended – or sourcing a driveshaft specifically designed for a manual-transmission E36.
Inspect the driveshaft’s U-joints and center support bearing (if equipped) for wear during this process. Replacing these components proactively prevents future failures. Accurate measurement is paramount; incorrect length can induce vibrations, stressing the drivetrain components and potentially causing damage over time.
Differential and Final Drive Ratio
Selecting the appropriate final drive ratio is crucial for optimizing performance after an E36 manual swap. Automatic transmissions often paired with taller (numerically lower) ratios. Switching to a manual allows exploration of shorter ratios for improved acceleration, particularly beneficial for track or spirited driving. However, shorter ratios may slightly reduce top speed and fuel economy.
Consider your driving style and intended use. Increasing the final drive ratio, often called a “poor man’s supercharger,” can significantly enhance responsiveness. Evaluate whether the change aligns with your needs, as it may not be noticeable in all driving scenarios. Careful consideration is key.
Post-Swap Adjustments and Troubleshooting
Following the E36 manual swap, meticulous adjustments are essential for smooth operation. Proper clutch adjustment is paramount, ensuring engagement occurs at the correct pedal position. Thoroughly bleed the clutch hydraulic system to eliminate air bubbles, preventing spongy pedal feel and ensuring full disengagement.
Common issues include difficulty shifting, clutch slippage, or unusual noises. Inspect the clutch disc and pressure plate for wear or damage. Verify proper throw-out bearing function. Utilize diagnostic tools like ISTA/INPA to scan for error codes and pinpoint potential problems. Address any issues promptly to maintain drivetrain health.
Clutch Adjustment and Bleeding
Precise clutch adjustment is critical post-swap for optimal E36 performance. Begin by ensuring the clutch cable (or hydraulic system) has the correct free play. Too little play causes constant engagement, while excessive play hinders full disengagement. Adjust the cable via the adjuster nut, or bleed the hydraulic system using a pressure bleeder or traditional method.
Bleeding removes air bubbles, resulting in a firm pedal feel. Start with the slave cylinder, opening and closing the bleed screw while slowly pumping the clutch pedal. Repeat until bubble-free fluid emerges. Proper adjustment and bleeding guarantee smooth shifts and prevent premature wear.
Common Issues and Solutions
Post-swap, several issues can arise during an E36 manual conversion. Difficulty shifting often stems from improper clutch adjustment or air in the hydraulic line – re-check bleeding procedures. A rattling noise might indicate a worn throw-out bearing, requiring replacement. If the transmission fails to engage, verify the clutch disc is correctly installed and the pilot bearing isn’t seized.
Electrical gremlins, like the reverse light not functioning, necessitate checking the reverse light switch wiring. Utilizing diagnostic tools like ISTA/INPA can pinpoint electrical faults. Address any issues promptly to ensure a reliable and enjoyable driving experience.
Software and Diagnostic Tools (ISTA/INPA)
Post-conversion, BMW-specific diagnostic software is invaluable. ISTA (Integrated Service Technical Application) provides comprehensive troubleshooting guides and coding capabilities. INPA (Integrated Navigation and Power Application) allows for real-time data monitoring, crucial for verifying sensor functionality and identifying potential issues with the new manual setup.
These tools can help clear any post-swap error codes related to the removed automatic transmission components, like the ATCU. Successfully connecting these programs may require specific software versions and interfaces. Utilizing these tools ensures optimal performance and addresses any lingering electrical or mechanical concerns.
Wheel and Tire Fitment Guide Relevance
While seemingly unrelated, wheel and tire fitment can become relevant post-swap. A manual transmission alters the driving dynamics, potentially influencing desired tire characteristics for optimal grip and handling. Exploring existing E36 fitment guides provides insights into wheel offsets, widths, and tire sizes that complement the enhanced driving experience.
Consideration should be given to maintaining proper clearance, especially if suspension modifications are planned alongside the transmission swap. A well-chosen wheel and tire setup maximizes the benefits of the manual conversion, improving overall performance and aesthetics.

M50/M54 Engine Swap Considerations (Related to Manual Conversion)
If concurrently performing an M50 or M54 engine swap, the manual conversion simplifies integration. These engines are frequently paired with manual transmissions, offering readily available conversion components and established procedures. Planning both swaps simultaneously streamlines the process, avoiding redundant work and potential compatibility issues.
Ensure the engine management system is correctly configured for the manual transmission, addressing aspects like launch control and rev-matching features. Utilizing diagnostic tools like ISTA can aid in proper calibration and troubleshooting post-installation, maximizing performance and reliability.
Final Drive Ratio Impact on Performance

Selecting the correct final drive ratio is crucial post-swap, influencing acceleration and top speed. A shorter ratio enhances acceleration, ideal for spirited driving and track use, but may reduce highway fuel efficiency. Conversely, a taller ratio prioritizes fuel economy and cruising comfort at the expense of initial acceleration.
Consider your driving style and intended use when choosing a ratio. Modifications like increasing the ratio are common, but their impact varies depending on the specific application. Careful evaluation and potentially testing different ratios are recommended to optimize performance for your needs.
Related Posts

first aid cpr aed participant’s manual pdf
Download a comprehensive First Aid, CPR & AED participant’s manual in PDF format! Be prepared for emergencies – quick access to vital info here. Stay safe!

how to compact soil manually
Ready to master manual soil compaction? Our comprehensive guides provide step-by-step instructions and expert tips for creating a firm, stable base for any project. Download your PDF manual and build with confidence!

nikon n80 camera manual
Lost your Nikon N80 camera manual? Find a clear, downloadable PDF guide right here! Get back to taking amazing photos fast. Troubleshooting & tips included!