
daikin air conditioner control panel instructions
Daikin Air Conditioner Control Panel Instructions: A Comprehensive Guide

Welcome! This guide details operation of your Daikin unit. Refer to your specific model’s manual for detailed instructions. Understanding the controller is key to efficient use, including powering on/off and temperature settings.
Understanding Your Daikin Control Panel

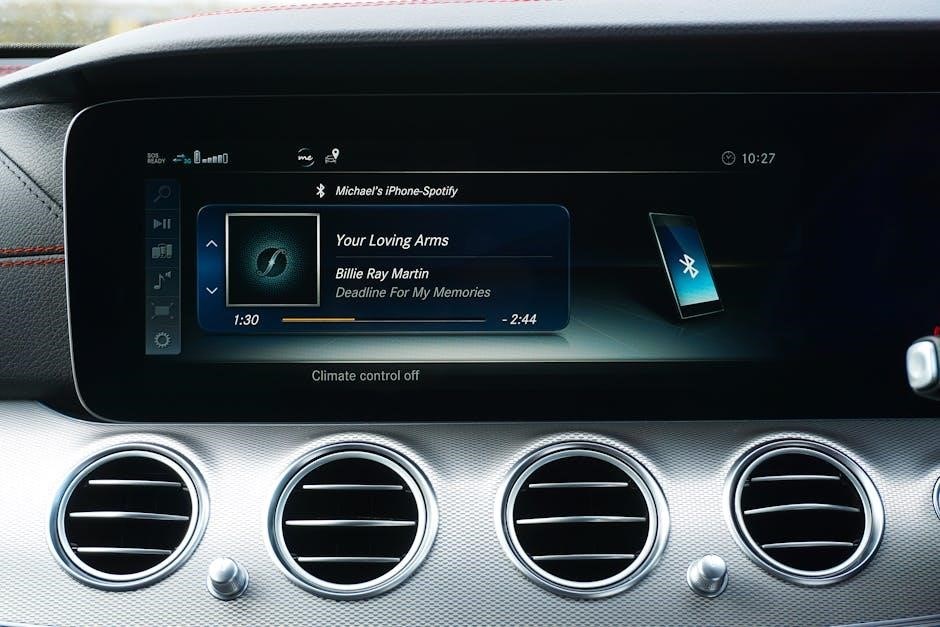
Familiarization is crucial. Your Daikin air conditioner’s control panel serves as the central hub for managing your indoor climate. These panels vary based on the model – some feature simple button layouts, while others boast more advanced touch screen interfaces. Regardless of the design, core functionalities remain consistent. The primary components include the power button, temperature adjustment controls (often up/down arrows), fan speed settings, and mode selection options (Cool, Heat, Auto, Dry).
Key elements to identify include the display area, which shows the current temperature, set temperature, and operational mode. Pay attention to indicator lights, as these signal the unit’s status – whether it’s heating, cooling, or in standby. The control panel often integrates with remote controls, allowing for duplicated functionality. Understanding the layout and symbols will streamline operation. Referencing the operation manual specific to your REYQ or RQYQ series model is highly recommended for precise details regarding your unit’s controller. Remember to consult a Daikin dealer for complex issues.
Types of Daikin Control Panels
Daikin offers a variety of control panel options tailored to different air conditioning systems and user preferences. Traditional panels feature physical buttons for power, mode selection, temperature adjustment, and fan speed. These are common in older or simpler Daikin units, like those in the REYQ and RQYQ series, and prioritize straightforward operation. More modern systems utilize touch-sensitive panels, offering a sleek aesthetic and often incorporating advanced features like programmable timers and energy-saving modes.
For sophisticated facility management, Daikin’s Touch Manager controls VRV systems and integrates with lighting and fire alarm systems. These panels provide centralized control for multiple buildings. Some units also support wireless remote controls that mirror the functions of the main control panel. The FTKD50BVM model, for example, allows recording preferred settings. Understanding your specific panel type is vital; consult your operation manual to unlock its full potential. Daikin leverages technology to deliver solutions for any setting, so panel types vary significantly.
Basic Operation: Powering On/Off
Initiating operation with your Daikin air conditioner is generally straightforward, though slight variations exist between control panel types. Typically, a dedicated “On/Off” button initiates the system. Refer to Figure 4 in your operation manual for specific button locations on REYQ and RQYQ series units. Pressing this button once activates the unit, and pressing it again deactivates it. Ensure the main power switch is turned on before attempting to use the control panel; this protects the unit and ensures proper functionality.
Some systems require a specific sequence, such as pressing the “On/Off” button followed by a mode selection. The control panel display will illuminate, indicating the unit is receiving power. During initial startup, the unit may perform self-diagnostic checks, which is normal. If the unit fails to power on, verify the power cord is securely connected and the circuit breaker hasn’t tripped. For complex systems managed by a Touch Manager, the power function is integrated into the facility management software. Always consult your manual for precise instructions.
Temperature Adjustment
Adjusting the temperature on your Daikin air conditioner is crucial for comfort and energy efficiency. The control panel features buttons, often marked with up and down arrows, to increase or decrease the set temperature. The operation manual specifies the operating range for your model – typically, this is between 60°F and 86°F (16°C and 30°C). Setting the temperature 2-3°C higher during cooling than your usual preference can activate energy-saving mode.
The display will show the currently set temperature. Remember that the unit doesn’t instantly reach the set temperature; it works to achieve it. Some models allow temperature settings in both Celsius and Fahrenheit. For precise control, avoid frequent, large temperature adjustments. Instead, make small changes and allow the system to stabilize. Recording your preferred temperature and airflow rate, as suggested in some manuals, can streamline future adjustments. Always refer to your model’s manual for specific temperature adjustment procedures.
Fan Speed Control
Controlling the fan speed on your Daikin air conditioner allows you to customize airflow and comfort levels. The control panel typically offers several fan speed settings: Auto, Low, Medium, and High. The ‘Auto’ setting adjusts fan speed automatically based on the difference between the set temperature and the room temperature. Lower fan speeds are quieter and consume less energy, ideal for sleeping or quiet activities. Higher fan speeds provide faster cooling or heating, but use more electricity.
To adjust the fan speed, use the dedicated ‘Fan Speed’ button on the control panel. Each press cycles through the available settings. Setting the fan strength to the lowest setting, combined with a slightly adjusted temperature, facilitates energy-saving mode. Some models feature a ‘Quiet’ mode which automatically selects a low fan speed. Remember to consult your operation manual for specific instructions related to your Daikin model, as button labels and functionality can vary. Proper fan speed selection optimizes both comfort and energy consumption.
Mode Selection: Cool, Heat, Auto, Dry
Daikin air conditioners offer multiple operating modes to suit various environmental conditions and personal preferences. The primary modes are Cool, Heat, Auto, and Dry. ‘Cool’ mode lowers the room temperature, providing a cooling effect. ‘Heat’ mode raises the room temperature, offering warmth during colder months. ‘Auto’ mode intelligently switches between cooling and heating to maintain the set temperature, optimizing energy efficiency. The ‘Dry’ mode, also known as dehumidification, reduces humidity levels without significantly altering the temperature.
Selecting a mode is typically done via a ‘Mode’ button on the control panel. Each press cycles through the available options. When using Auto mode, the unit automatically determines the appropriate operation. Setting a temperature 2-3°C higher than normal in cooling mode can enhance energy savings. Remember to consult your operation manual for specific details regarding your model’s mode functionality and any unique features. Understanding each mode allows for optimal comfort and efficient operation.
Airflow Direction Control
Daikin air conditioners provide adjustable airflow direction for personalized comfort. You can typically control both the horizontal and vertical airflow using dedicated buttons on the control panel. Horizontal airflow directs air from side to side, while vertical airflow adjusts the angle – up or down. This allows you to distribute cool or warm air evenly throughout the room, avoiding direct drafts.
Adjusting airflow is crucial for maximizing comfort and efficiency. Pressing the ‘Airflow Direction’ button often cycles through preset options like automatic swing, fixed upward, fixed downward, or fixed horizontal. Some models offer more granular control, allowing precise angle adjustments. Refer to your operation manual for specific instructions on your unit. Understanding how to manipulate airflow ensures optimal temperature distribution and prevents discomfort. For detailed information, consult the ‘IR FLOW DIRECTION’ section of your manual, if applicable;
Using the Timer Function
Daikin air conditioners often feature a timer function for convenient and energy-efficient operation. This allows you to schedule the unit to automatically turn on or off at specific times. Typically, the control panel includes ‘Timer’ or ‘On/Off’ timer buttons. Setting a timer can help you pre-cool or pre-heat a room before you arrive, or automatically turn off the unit while you sleep, saving energy.
Programming the timer usually involves setting the desired start and end times. Some models offer multiple timer settings for different days of the week. The ‘ME LEAVE’ button, mentioned in some manuals, may initiate a timer function for automatic shutdown. Remember to consult your operation manual for precise instructions, as timer functionalities vary between models. Utilizing the timer function effectively contributes to both comfort and reduced energy consumption, offering a practical solution for daily climate control.
Understanding Error Codes
Daikin air conditioners utilize error codes displayed on the control panel to indicate malfunctions or issues requiring attention. These codes are crucial for troubleshooting and diagnosing problems, potentially avoiding costly repairs. The operation manuals provide a comprehensive list of these codes and their corresponding meanings. Common issues might trigger codes related to sensor failures, refrigerant leaks, or compressor problems;
When an error code appears, immediately consult your unit’s manual to identify the specific issue. Do not attempt to repair the unit yourself unless you are a qualified technician. The manuals often advise contacting a Daikin dealer for details and professional assistance. Ignoring error codes can lead to further damage and reduced efficiency. Recognizing these codes empowers you to communicate the problem accurately to a service professional, ensuring a swift and effective resolution. Remember, safety is paramount; always prioritize professional help when dealing with complex issues.
Troubleshooting Common Issues
Encountering problems with your Daikin air conditioner? Start with simple checks. If the unit doesn’t power on, verify the main power switch is engaged and the circuit breaker hasn’t tripped. A unit that isn’t cooling effectively may have a dirty air filter – regular cleaning is vital. If the control panel displays an error code, immediately reference your operation manual for diagnosis; attempting self-repair without understanding the code is discouraged.
For airflow issues, ensure vents aren’t blocked and the fan speed is appropriately set; If the unit cycles on and off frequently, it could indicate a refrigerant issue or a problem with the thermostat. Remember, some operation is considered normal, as noted in the manuals. When in doubt, or if the problem persists, contact your Daikin dealer for professional assistance. Attempting complex repairs yourself can void warranties and potentially cause further damage. Prioritize safety and professional expertise.
Remote Control vs. Control Panel

Daikin systems often offer dual control options: a traditional remote control and a centralized control panel. The remote provides convenient, localized adjustments – ideal for individual comfort preferences within a room. However, the control panel, particularly with advanced systems like VRV, offers broader facility management capabilities, extending beyond simple temperature settings.

Control panels can integrate air conditioning with lighting and fire alarm systems, providing a holistic approach to building management. While the remote is user-friendly for everyday operation, the panel allows for scheduled settings, energy monitoring, and potentially, remote access. Some models, like the FTKD50BVM, suggest recording preferred settings for easy recall, a feature accessible through both interfaces. Utilizing the “ME LEAVE” button, as mentioned in some manuals, streamlines operation, potentially avoiding cumbersome remote adjustments. Ultimately, the best choice depends on your needs – convenience versus comprehensive control.
Advanced Features: Energy Saving Mode
Daikin air conditioners frequently incorporate energy-saving modes designed to optimize performance and reduce electricity consumption. These features intelligently adjust operation to minimize waste without significantly compromising comfort. Setting the fan strength to its lowest setting, as highlighted in some operation manuals (like the FTKD50BVM), is a common component of this mode.
Energy saving mode often involves a slight temperature adjustment – typically 2-3°C higher during cooling – which can noticeably lower energy usage. This subtle shift is often imperceptible to occupants, making it a seamless way to conserve power. The mode is particularly beneficial when the unit is left unattended or during sleep, ensuring efficient operation without constant manual adjustments. Utilizing these features aligns with sustainable practices and can lead to substantial cost savings over time. Daikin’s intelligent Touch Manager further enhances energy management capabilities within larger facility systems;
Advanced Features: Quiet Mode
Daikin air conditioners often feature a “Quiet Mode” designed to minimize operational noise, creating a more peaceful environment. This mode typically achieves reduced sound levels by lowering the fan speed and subtly adjusting compressor settings. While some reduction in cooling or heating capacity may occur, the trade-off is a significantly quieter operation, ideal for bedrooms, offices, or any space where noise is a concern.
Activating Quiet Mode is usually straightforward via the control panel or remote control. The specific button or menu option may vary depending on the model, so consulting your operation manual is recommended. This feature is particularly useful during nighttime hours or when needing a distraction-free atmosphere. Daikin’s commitment to comfort extends beyond temperature control, prioritizing a serene indoor climate. Utilizing Quiet Mode demonstrates a focus on well-being and a preference for minimal disturbance, enhancing the overall user experience.
Advanced Features: Powerful Mode
Daikin’s Powerful Mode is engineered for rapid temperature adjustment, quickly cooling or heating a room when it’s significantly warmer or cooler than the set temperature. This feature overrides standard operating parameters, directing the unit to operate at maximum capacity for a defined period, typically around 20-60 minutes. It’s ideal for situations like returning to a hot home after being away or quickly cooling a room filled with people.
Engaging Powerful Mode is usually accomplished with a dedicated button on the remote control or through a menu option on the control panel. During operation, the compressor and fan run at their highest settings, resulting in a noticeable increase in airflow and cooling/heating performance. While effective, it’s important to note that Powerful Mode consumes more energy. Once the desired temperature is reached, the unit will automatically revert to the previously selected settings, ensuring efficient and comfortable operation. This mode exemplifies Daikin’s responsiveness to immediate comfort needs.
Control Panel Display Indicators
Understanding the indicators on your Daikin control panel is crucial for monitoring system status and diagnosing potential issues. Common icons include a power indicator, illuminating when the unit is active; a cooling or heating indicator, signifying the selected mode; and fan speed indicators, displaying the current fan setting. Temperature setpoints are prominently displayed, allowing for easy verification.
Additional indicators often include a timer icon when the timer function is engaged, an error code display for troubleshooting, and potentially icons for features like ‘Powerful Mode’ or ‘Quiet Mode’ when activated. Some models feature filter indicators, alerting you when it’s time for filter replacement. A flashing indicator usually signals an issue requiring attention, prompting you to consult the troubleshooting section of your manual or contact Daikin support. Familiarizing yourself with these symbols ensures you can quickly assess your system’s operation and address any concerns promptly, maximizing efficiency and comfort.
Maintaining Your Control Panel
Regular cleaning of your Daikin control panel is essential for optimal performance and longevity. Dust and debris can accumulate, potentially hindering button responsiveness and obscuring display indicators. Use a soft, dry cloth to gently wipe the surface, avoiding abrasive cleaners or excessive moisture.
Avoid spraying liquids directly onto the panel; instead, dampen the cloth lightly. Periodically check the buttons for stickiness or residue, cleaning as needed. If the display becomes difficult to read, ensure the panel is clean and the backlight (if applicable) is functioning correctly. Do not attempt to disassemble the control panel for cleaning, as this could void your warranty and potentially damage internal components. Proper maintenance ensures clear visibility of settings and reliable operation, contributing to a consistently comfortable indoor environment. A well-maintained control panel enhances the overall user experience and extends the life of your Daikin system.
Safety Precautions
Always prioritize safety when operating your Daikin air conditioner and its control panel. Never attempt to repair or disassemble the unit yourself; contact a qualified Daikin dealer for assistance. Ensure the main power switch is off before cleaning or performing any maintenance. Avoid operating the unit in areas with flammable materials or high humidity.
Do not insert foreign objects into the control panel, as this could cause damage or electrical shock. If you notice any unusual smells, sounds, or smoke, immediately turn off the unit and disconnect the power supply. Keep the control panel dry and protected from direct sunlight. Be cautious when adjusting settings, particularly during extreme weather conditions. Following these precautions will help ensure safe and reliable operation of your Daikin air conditioning system, protecting both yourself and your equipment. Remember to consult the full operation manual for comprehensive safety guidelines.
Contacting Daikin Support
Need assistance? Daikin offers multiple avenues for support regarding your air conditioner and control panel. For detailed troubleshooting or specific model inquiries, contacting Daikin directly is recommended. The provided operation manuals consistently advise contacting your local Daikin dealer for complex issues or repairs. This ensures a qualified technician addresses your concerns.
Explore online resources first, including the Daikin website, which often features FAQs, downloadable manuals, and troubleshooting guides. If you require direct assistance, locate your regional Daikin support contact information through their official website. Be prepared to provide your unit’s model number (e.g;, REYQ8PY1B, RQYQ8PY1B, FTKD50BVM) for efficient support. Remember, attempting self-repair can void warranties and potentially cause further damage. Daikin prioritizes customer satisfaction and offers dedicated support to ensure optimal performance of your air conditioning system.
Resources: Operation Manuals & Online Support
Accessing vital information for your Daikin air conditioner is crucial for optimal operation and troubleshooting. Daikin provides comprehensive operation manuals specific to each model – REYQ8PY1B, REYQ10PY1B, REYQ12PY1B, RQYQ8PY1B, RQYQ10PY1B, and FTKD50BVM are examples. These manuals detail control panel functions, error codes, and safety precautions. Always refer to the manual corresponding to your unit.
Daikin’s official website is a valuable online resource. It hosts downloadable manuals, FAQs, and troubleshooting guides. Explore the site for information on features like energy-saving mode and airflow direction control. Furthermore, Daikin Global showcases their broader air conditioning solutions and facility management systems, including the Touch Manager. Utilize these resources before contacting support; often, solutions to common issues are readily available online. Remember to register your product for access to exclusive content and updates. Effective use of these resources empowers you to maintain your Daikin system efficiently.

Related Posts

delta 6-in-1 convertible crib instructions
Struggling with Delta 6-in-1 crib instructions? Don’t panic! Find clear, easy-to-follow guides & manuals right here. Get your little one sleeping soundly, faster!

tara tainton jerk off instruction
Discover amazing vegan recipes for every meal! From quick weeknight dinners to decadent desserts, find easy plant-based options to delight your taste buds.

or-asc instructions
Need help with your OR-ASC? Find clear, concise instructions & safety guidelines right here! Download the PDF and get operating smoothly. Simple & effective!